Business
5 Chalk Painting Tips For Beginners + Supplies You Must Have!
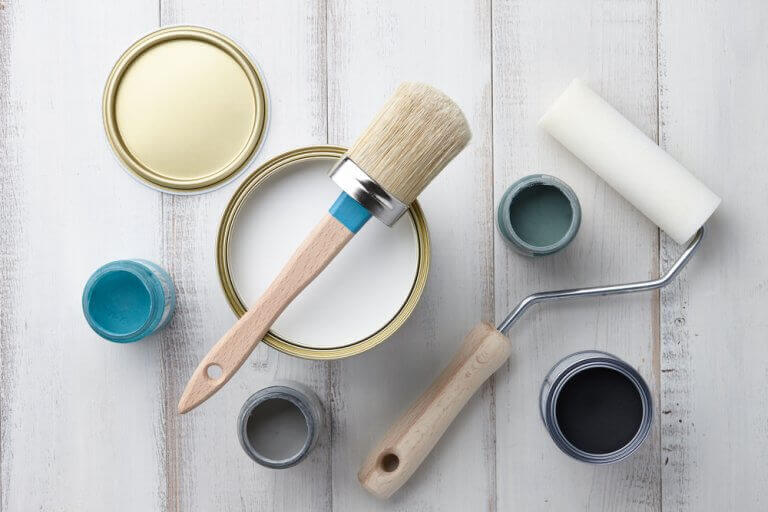
When it comes to DIY projects, painting might just be the most fun of them all. Whether you’re covering a whole wall with a new coat of color, or doing highly detailed work on your cabinets, Chalk Paint will do the job. As easy as it is to use Chalk Paint, it’s well worth keeping a few tips in mind while you have your brush in hand. With these five tips in mind, you’ll have no problem getting the right color for the job, whether it be a calming grey chalk paint, or a highlighting yellow.
Table of Contents
1. Sketch It Out
Put your drafting skills to the test and try to draw out what you want to see before you make it a reality. If you’re about to paint a chair or a fence, take a little time and sketch it out. It doesn’t have to be the most artistic image in the world, just enough for you to get a clear idea of what you’ll be working with. Then with colored pencils or markers or even crayons you can test out a few different colors and see how you feel about your desired shade without even picking up a brush.
If you’re still not satisfied with the color, and you don’t want to launch fully into the painting process quite yet, you can still apply a little paint before diving into the project. If you’re working on a chair or desk, try painting the back of a leg or any other out-of-sight place to get an idea of what you want. If you like what you see, keep going, and if not, you can always paint over it later.
2. Prepare the Piece
Once you’ve found the color you like, figure out how you want that color to look. Do you want a thick coat of solid color, or a washed coat that reveals the texture of the wood beneath the paint. We recommend you test both out and see which one you prefer. Any easy rule of thumb to remember: keep the paint cold if you want it to be thick, warm it up and water it down if you want it to be washed out and more transparent.
You should use painter’s tape if you’re trying to get a little complicated. Chalk Paint is perfect for a full monochrome coat of paint, but it can also be used for detailed work. Use painter’s tape to subdivide your piece. This will help you keep paint out of unwanted areas, as well as making it easier for you to focus on one section at a time as you’re doing detailed work. Also, make sure you take off the handles and latches of cabinets and tables so you don’t get paint on any metalwork (unless you want that, of course).
3. Let There Be Light
As with reading and writing, having as much light as possible is absolutely essential to good painting. If you’re working inside, get a couple lamps together and have them shine down on your work, or paint near a window and use the sun to light your way. Don’t paint in the shadows. You won’t have a good idea of what your colors actually look like if everything is darkened.
Since Chalk Paint works just as well indoors as it does outdoors, you could easily find yourself painting your front door or your shutters. Make sure to choose a sunny day to paint so you can maximize your lighting and reduce the chances of getting rained on.
Painting can take a long time, even when using broad strokes. Make sure you’re comfortable while you’re at work, especially if you’re doing detailed work. The more comfortable you are, the more patient you’ll be. Usually it’s best to paint while standing or sitting on a stool, so try to elevate your piece by placing it up on a table (well covered with newspapers of course). Do this, and your lower back will thank you.
4. Use Wax!
Wax is an absolute necessity when using Chalk Paint. You’re not working on a portrait or a landscape that will hang on the wall and stay there forever, you’re painting furniture and walls and floors that will deal with contact on a daily basis. These items go through wear and tear, and wax will keep your beautiful coats of Chalk Paint intact so long as you apply it.
Wait an hour after applying your last coat of Chalk Paint before putting on the wax. Take your wax brush and get as much wax in it as you can. With the wax at the ready, brush over your paint aggressively. You don’t have to be delicate with this step, just get the wax on there. If it starts to clump up and be noticeable, never fear. Just put more wax on it. This might sound counterintuitive, but wax loosens wax, and you’ll be able to spread the wax around properly the second time around.
5. Let It Sit
Painter’s remorse is a real thing. You just spent an hour working on painting a cabinet a beautiful sky blue, but after it’s done, you realize it’s not quite what you want it to be. That’s okay! Set it down and leave it for a day. Work on something else. Get your mind off the piece. After enough time has passed, come back to the piece and see how it appears to you then. Try placing it in different parts of the room under different lightings. If nothing seems to be working, and you find you don’t like the color no matter what, just repaint it!
It’s really no trouble repainting over an already existing coat of Chalk Paint, even if you’ve already waxed the piece. Remember to always keep in mind that the color of the surroundings are as important as the color of the piece itself. If you’re in a room with dark walls or floors, a bright paint might stick out more than you want. Feel free to experiment and have fun with it, after all, it’s just another excuse to keep painting!
Must Have Supplies
- Chalk Paint
- Clear Chalk Paint Wax
- Chalk Paint Brushes
- Chalk Paint Wax Brushes
- Detail Brushes

Why Text-to-SQL Models Break in Production (And How Semantic Layers Solve the Problem)

The Role of Peptides in Dry Skin Sunscreen: Unlocking Hydration and Protection

No Dogs Left Behind Complaints: Honest Answers to Common Concerns


-

 Business5 years ago
How to Do Long-Distance Moves with Children
-
 Business3 years ago
The Ultimate Guide To Thriving In Your Printing Franchise
-
Business3 years ago
Exploring The Benefits And Challenges Of Restaurant Franchising
-

 Tech5 years ago
Cyber Table That Will Change Your Life
-
Lifestyle3 years ago
Dallas’ Hidden Gems: 6 Must-Try Restaurants Off The Beaten Path!
-

 Biography3 years ago
Melody Marks- Personal Life, Education, Career, And Much More
-

 Business5 years ago
Is Guest Posting a Good Inbound Marketing Strategy?
-
Lifestyle3 years ago
Top 10 Restaurant Franchises In The US


Recent Comments